Build a Paypal Mock API for Load Testing in 10 Minutes
This post is being updated. It still refers to MockLab, which was the previous iteration of WireMock Cloud. You can still use WireMock Cloud to easily mock the Paypal API ant test against your own sandbox, but the specific screenshots and video are out of date. We apologise for the inconvenience and are working to update this guide ASAP.
Modern e-commerce websites and apps need to be fast and stable in order to avoid losing swathes of customers to competitors.
Achieving this requires regular performance testing of systems, but this is a problem for sites that accept payments with Paypal since running high load against their sandbox is specifically prohibited by their terms of service.
So what can you do?
One option is to simply have your load test stop short of the final step of your checkout. This is less than ideal for (hopefully) obvious reasons.
Another option is to mock the part of the app’s code that calls Paypal during load testing. This is an improvement, but still means critical bits of code used in production won’t be tested.
A better solution is to build a simulation of the Paypal API and connect your test environment to it.
MockLab is a tool specifically built for this purpose, and the rest of this article will focus on how you can use it to quickly construct a mock Paypal API suitable for performance testing.
Setup
To begin, you need to have logged into MockLab and created a new, empty mock API. You can sign up here if you haven’t already.
Once you’ve created a new mock API, grab a copy of its base URL. You can find this in the title bar:

You’ll also need the client ID and client secret from your Paypal Sandbox account.
We’ve developed a simple demo app for this tutorial. If you’d like to download and run this you can find it at https://github.com/mocklab/mocklab-demo-app
Once you’ve checked out the app, set the Paypal endpoint in src/main/resources/application.properties to your mock API’s base URL:
Then start the app:
Recording initial stubs
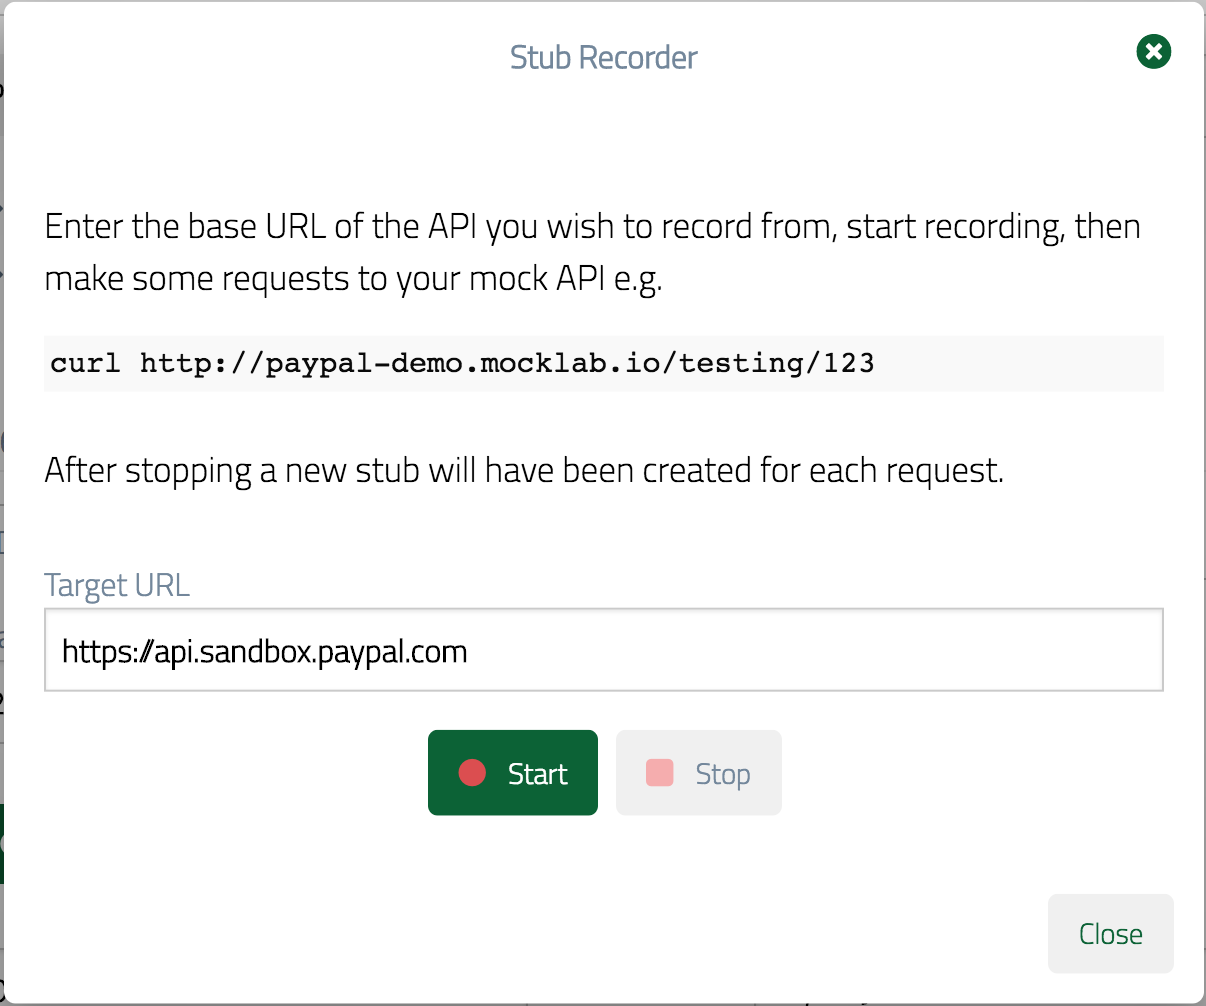
In MockLab, hit the Record button, set the target URL as Paypal’s sandbox then start recording:
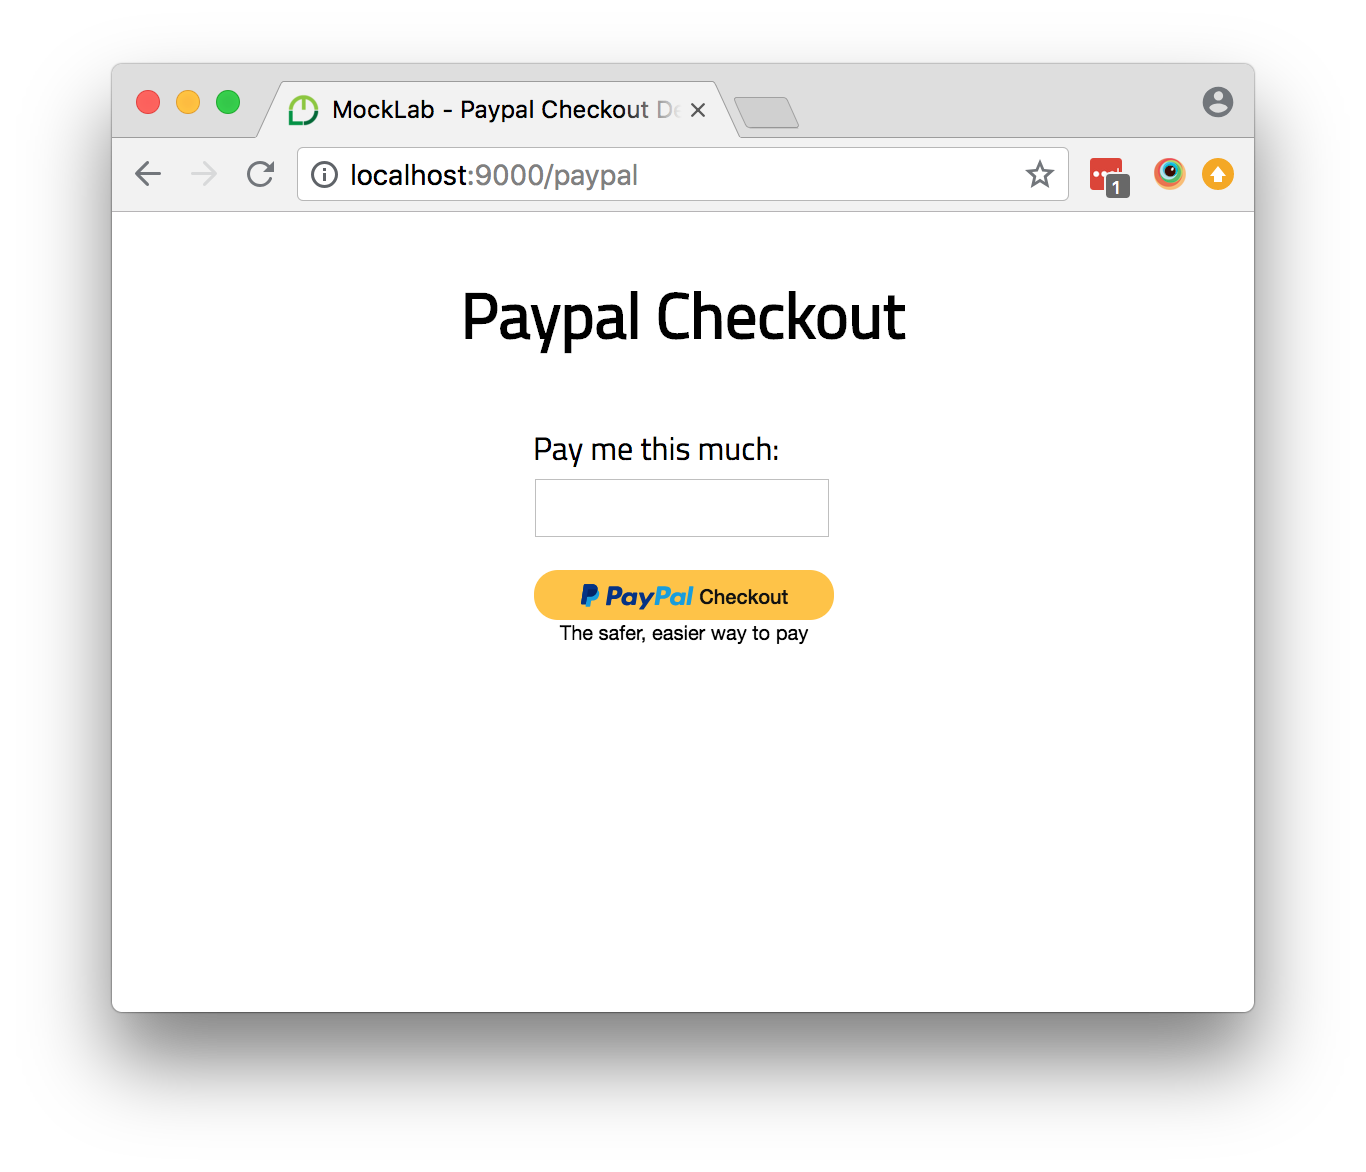
Go to http://localhost:9000/paypal, enter an amount and complete a Payment:
Return to MockLab and stop recording. You should now see two stubs have been appeared in the list, one for the prepare payment step and one for execute payment.
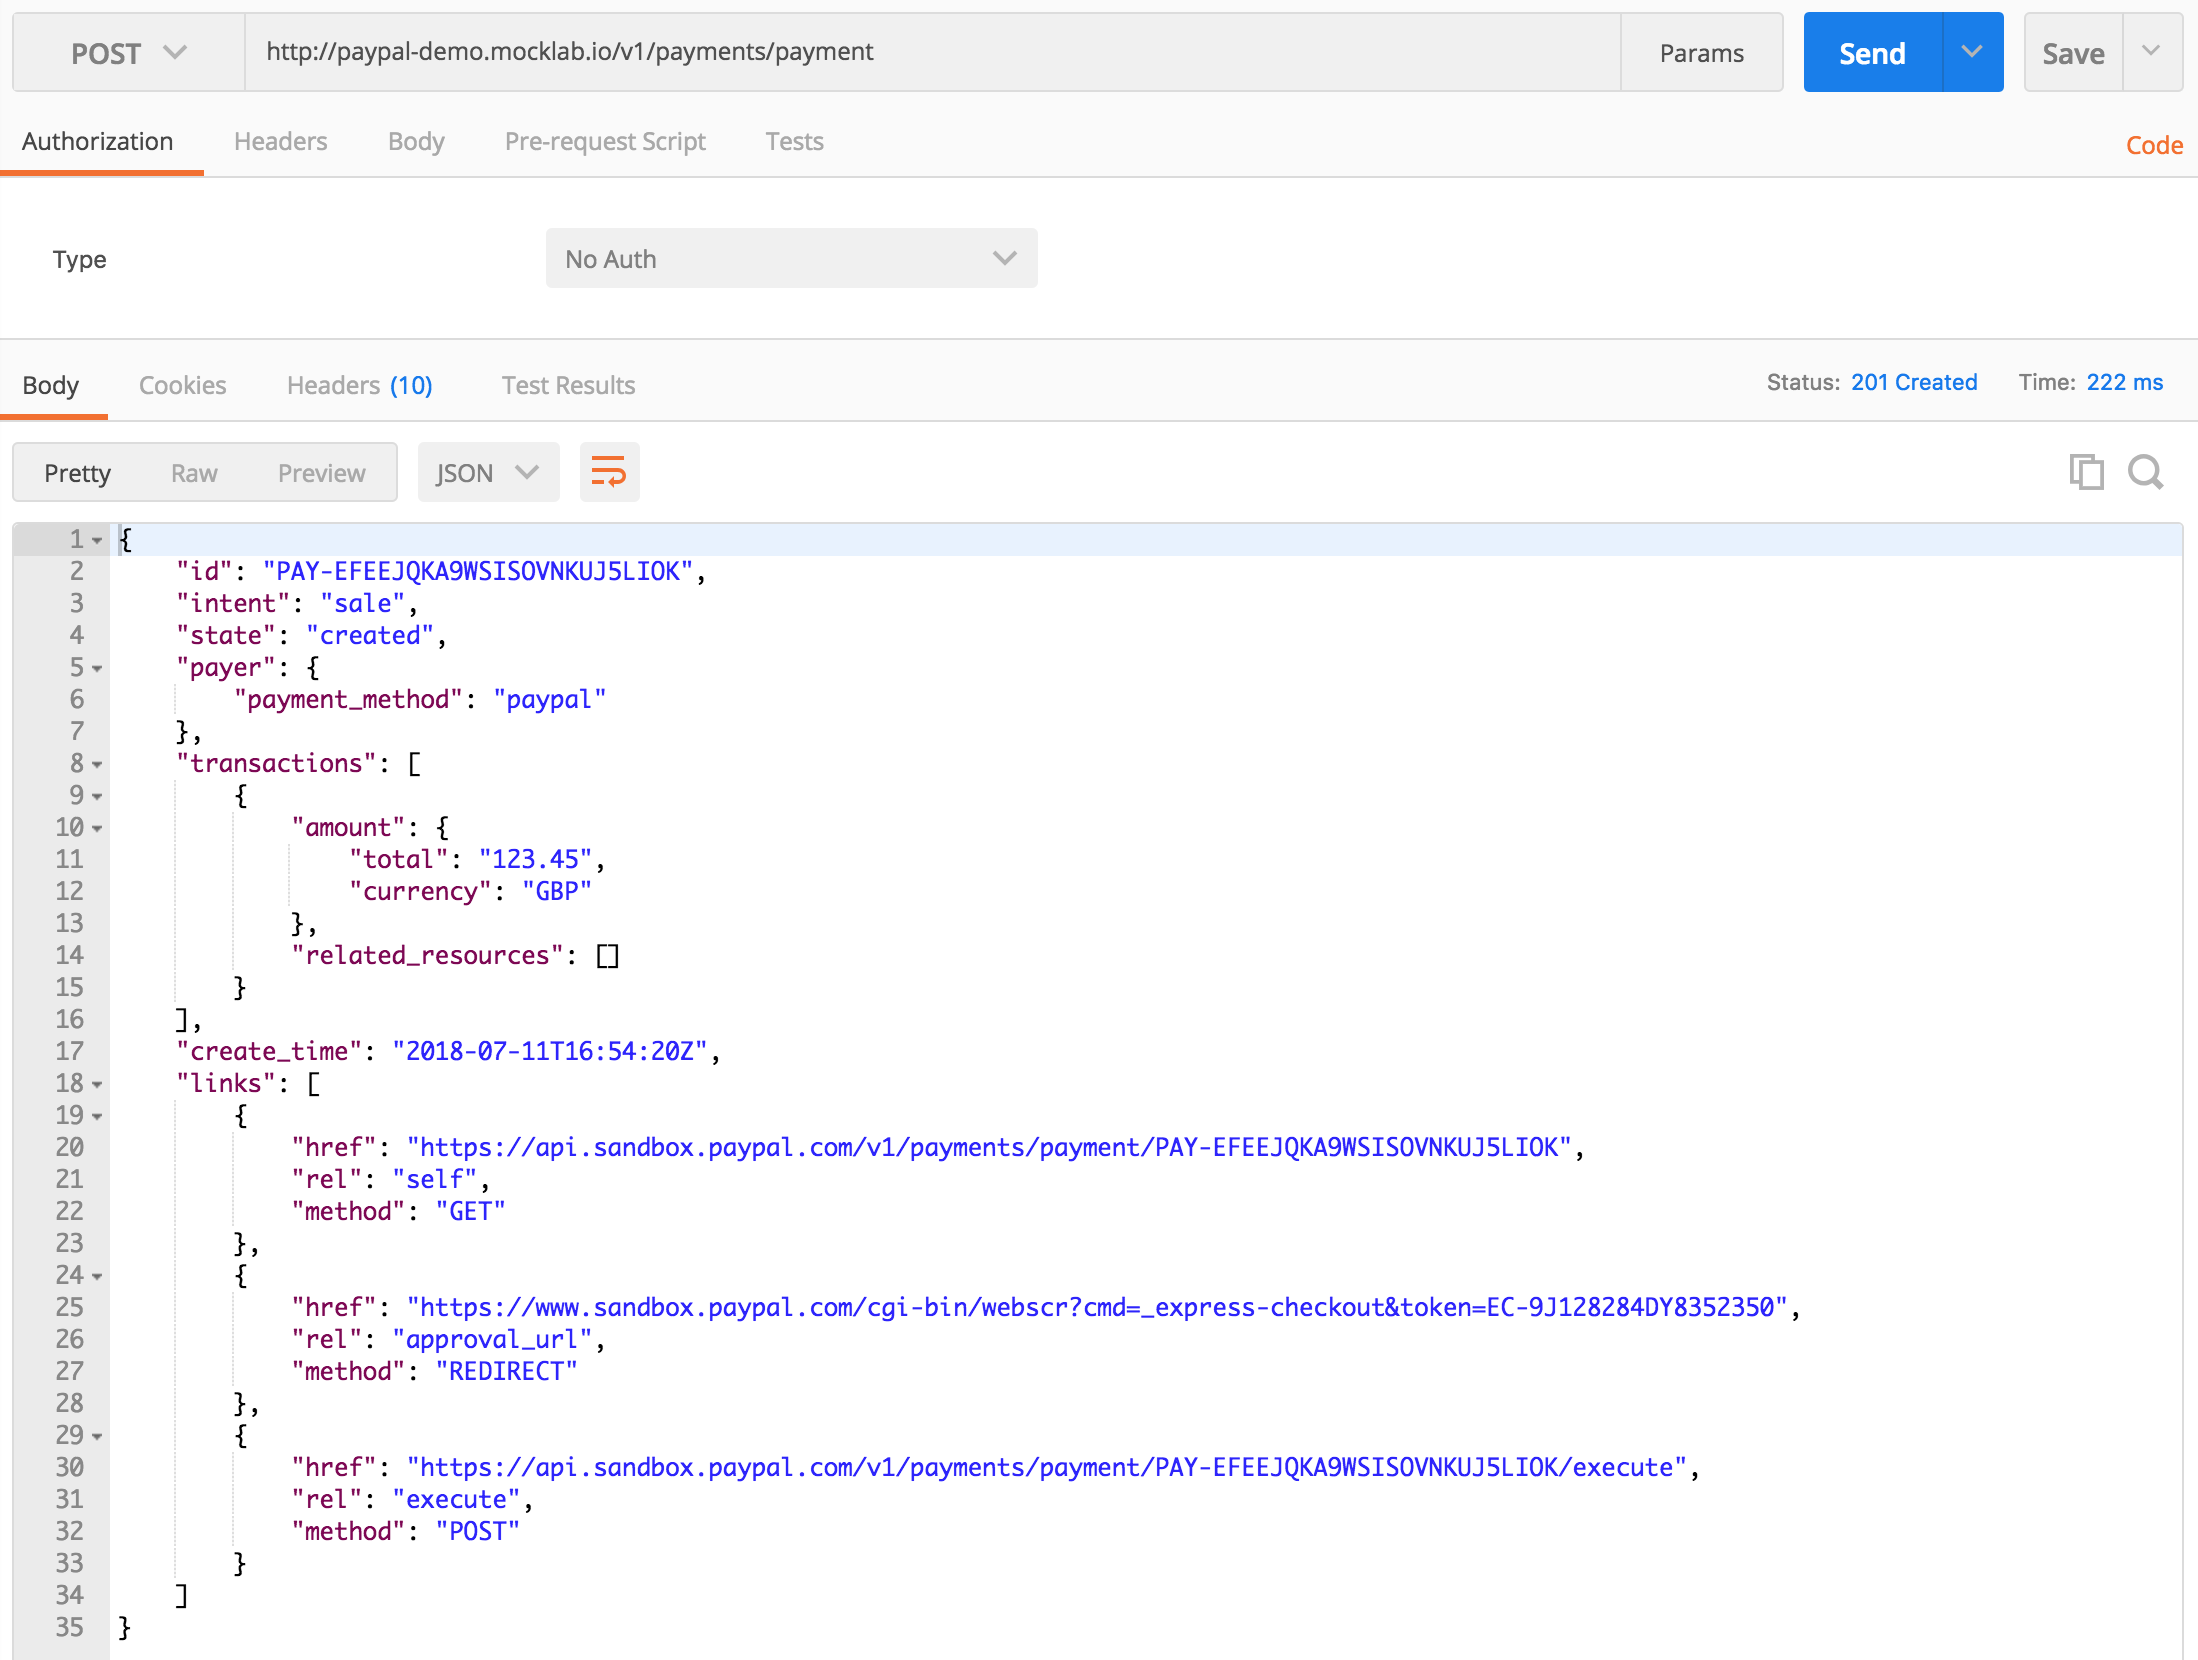
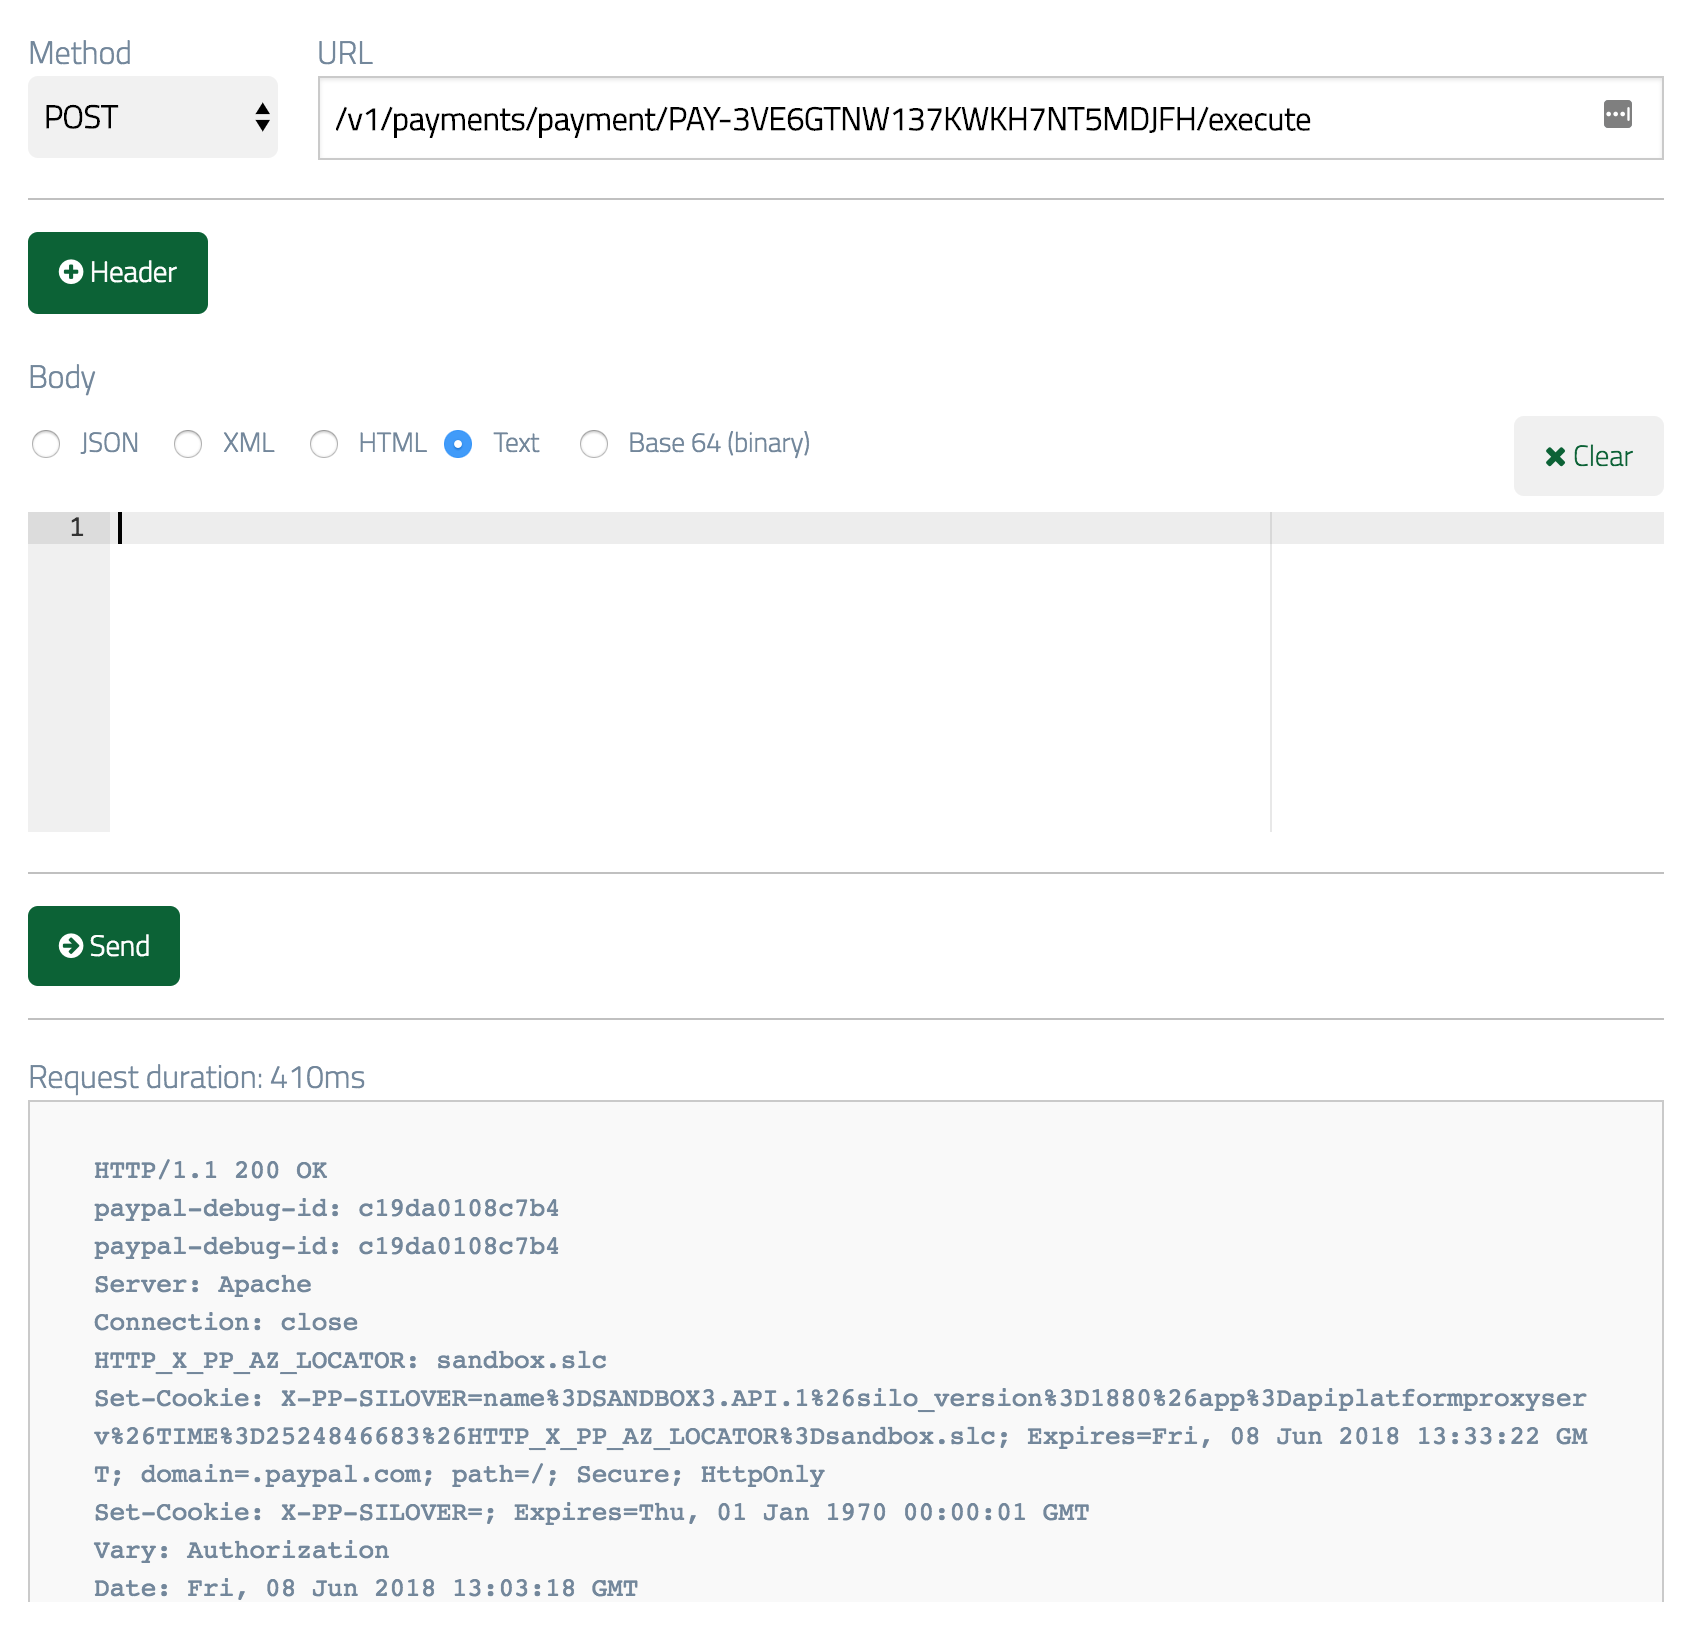
If you wish you can test these with the internal request maker or an HTTP client like Postman:
Making performance ready
Recorded stubs are by default very specific. They will only be matched to an incoming request if the method, URL and body match exactly. In practice this means they’ll only work for the exact same payment ID and amount.
Additionally they will return the same response each time, meaning IDs and dates you’d expect to be unique between requests will be the same. This causes problems if, for instance, the payment ID is saved in a unique field by your app.
All of these issues can be resolved using MockLab’s advanced matching and templated responses.
Create payment
Open the create payment stub first (the one with URL /v1/payments/payment). The generated name is a bit ugly so you may wish to change this to something more readable.
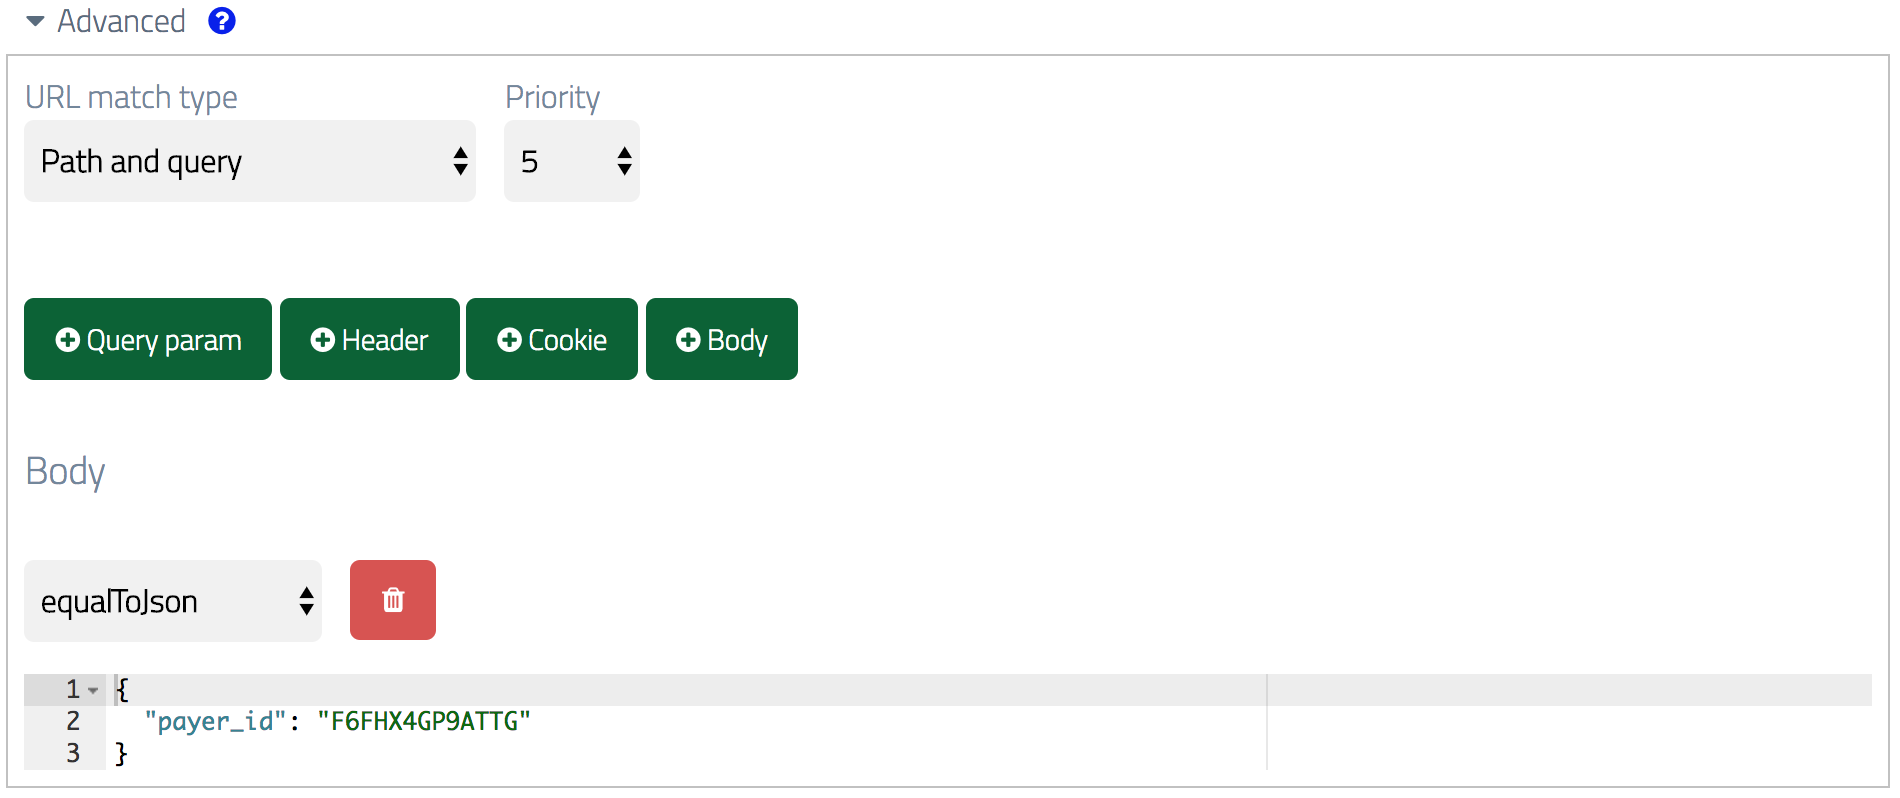
Next up, in the Advanced section you’ll notice there’s a body matcher for the exact JSON that was sent during recording. We don’t need this, since we want to respond to any create payment request, so delete this.
We want to ensure we’re sending a unique payment ID in the response each time. To do this, we need to enable response templating:

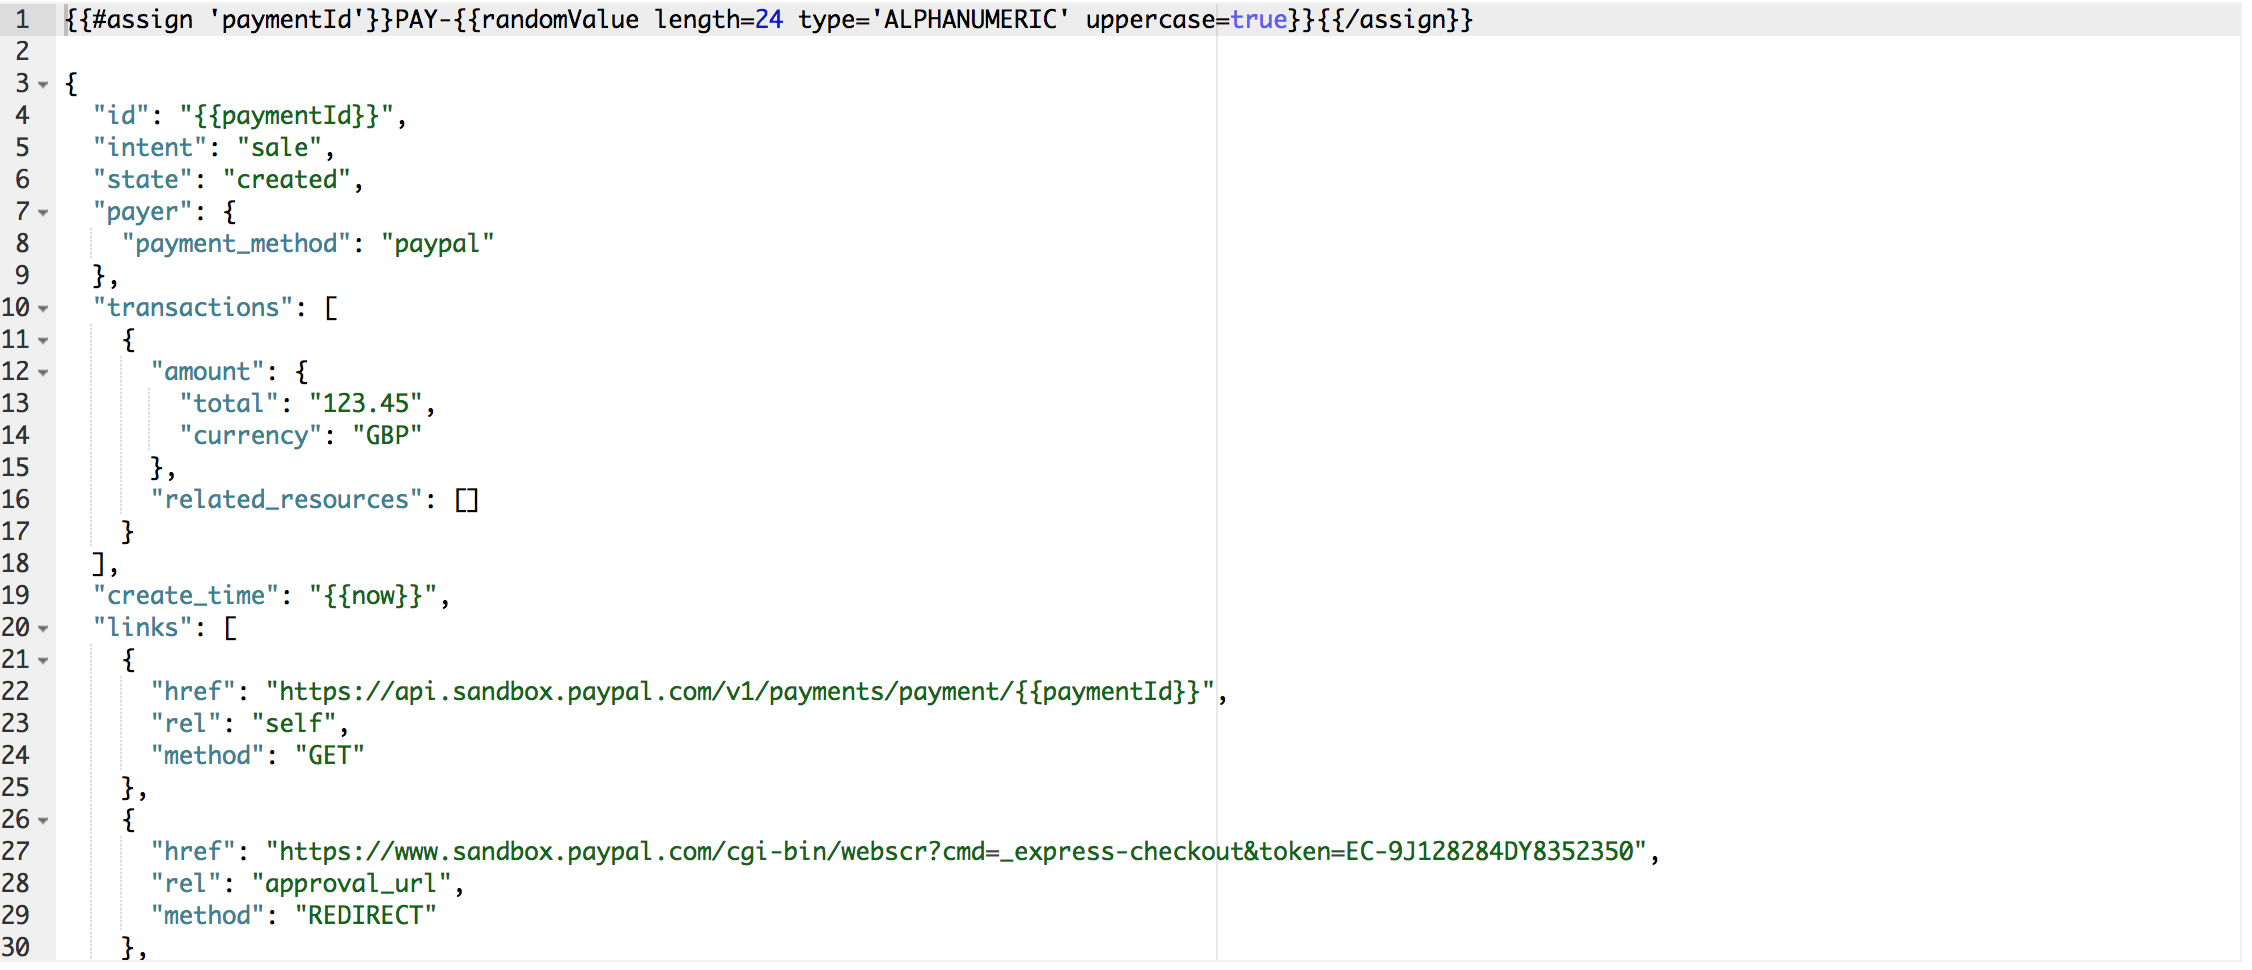
Then we need to generate a random ID for each response. We can do this by first assigning a variable by adding this line at the top of the response body:
and replacing instances of the payment ID with the variable we set e.g.
We also may wish to set the create_time field to the current time, rather than it being fixed at the one captured at record time:
Putting it all together it should look something like this:
Execute payment
We need to give similar treatment to the execute payment stub, with a key difference: rather than generating the payment ID at random, we want to extract it from the request URL.
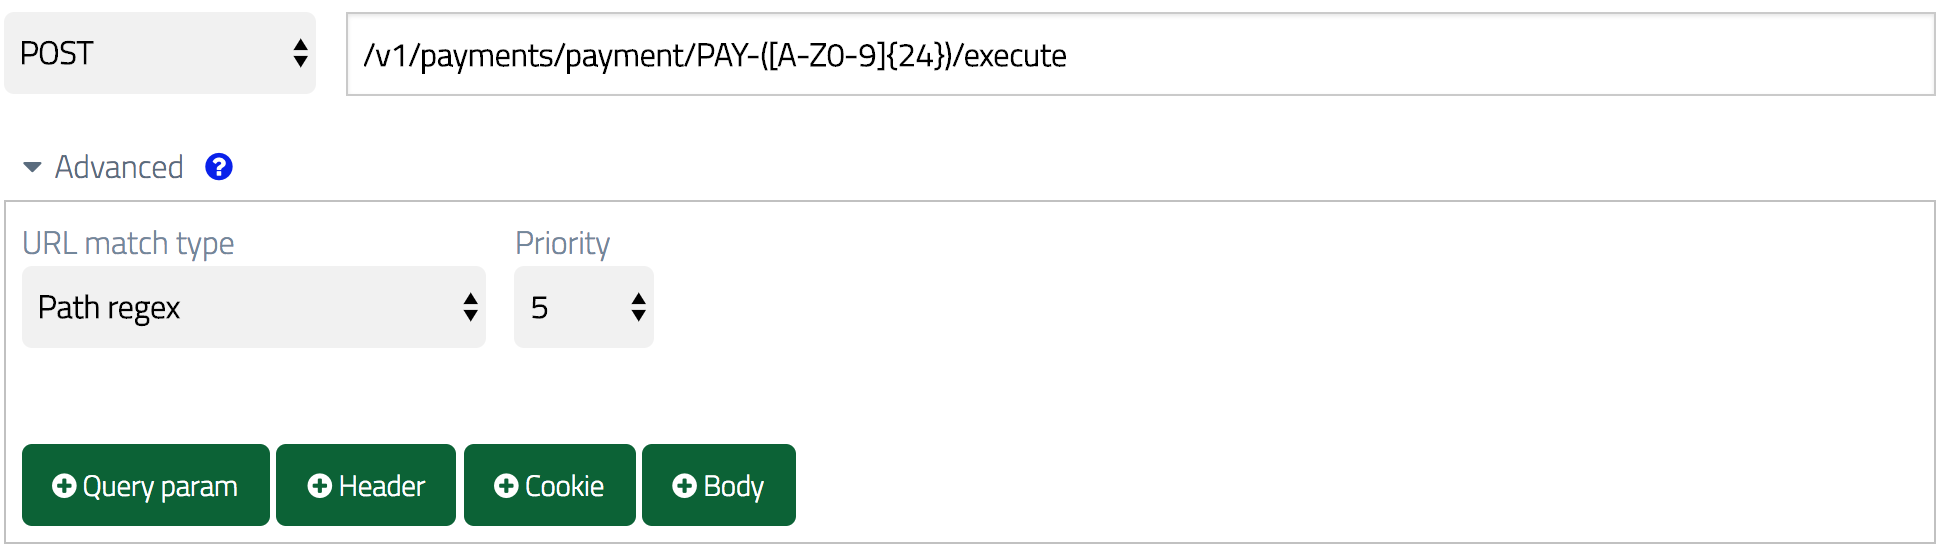
You’ll notice the request URL for the execute step is also very specific - it will only match the exact payment ID passed. We can fix this by converting it to a regular expression (not that the URL match type has also changed to ‘Path Regex’):
Next we’ll give the response body the same treatment as with the create payment stub, but extracting the ID from the URL:
(Ensure you change substitute the paymentId variables now variables where appropriate as before)
Adding delays for extra realism
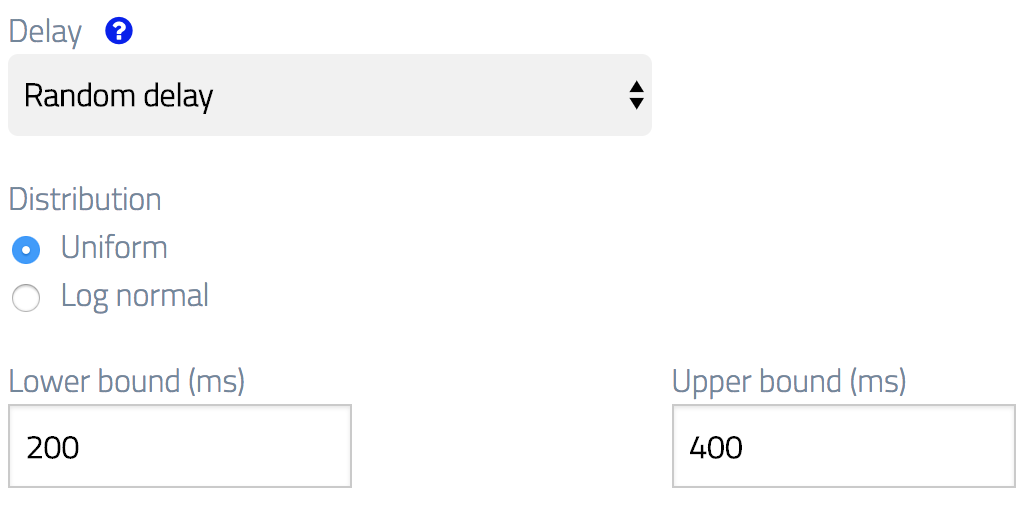
Since stubbed responses tend to return faster than from real APIs, this can create misleading outcomes when performance testing. To remedy this, you can add some artificial delay to your stubs:
Validating your stubs
You may wish to quickly test your updated stubs before pressing them into service. Again, you can do this with a tool like Postman, or with MockLab’s own test request maker:
Load testing
Now your mock API is ready for use. You can try it out by running the JMeter from the demo project and opening paypal-demo.jmx.
You can start JMeter like this:
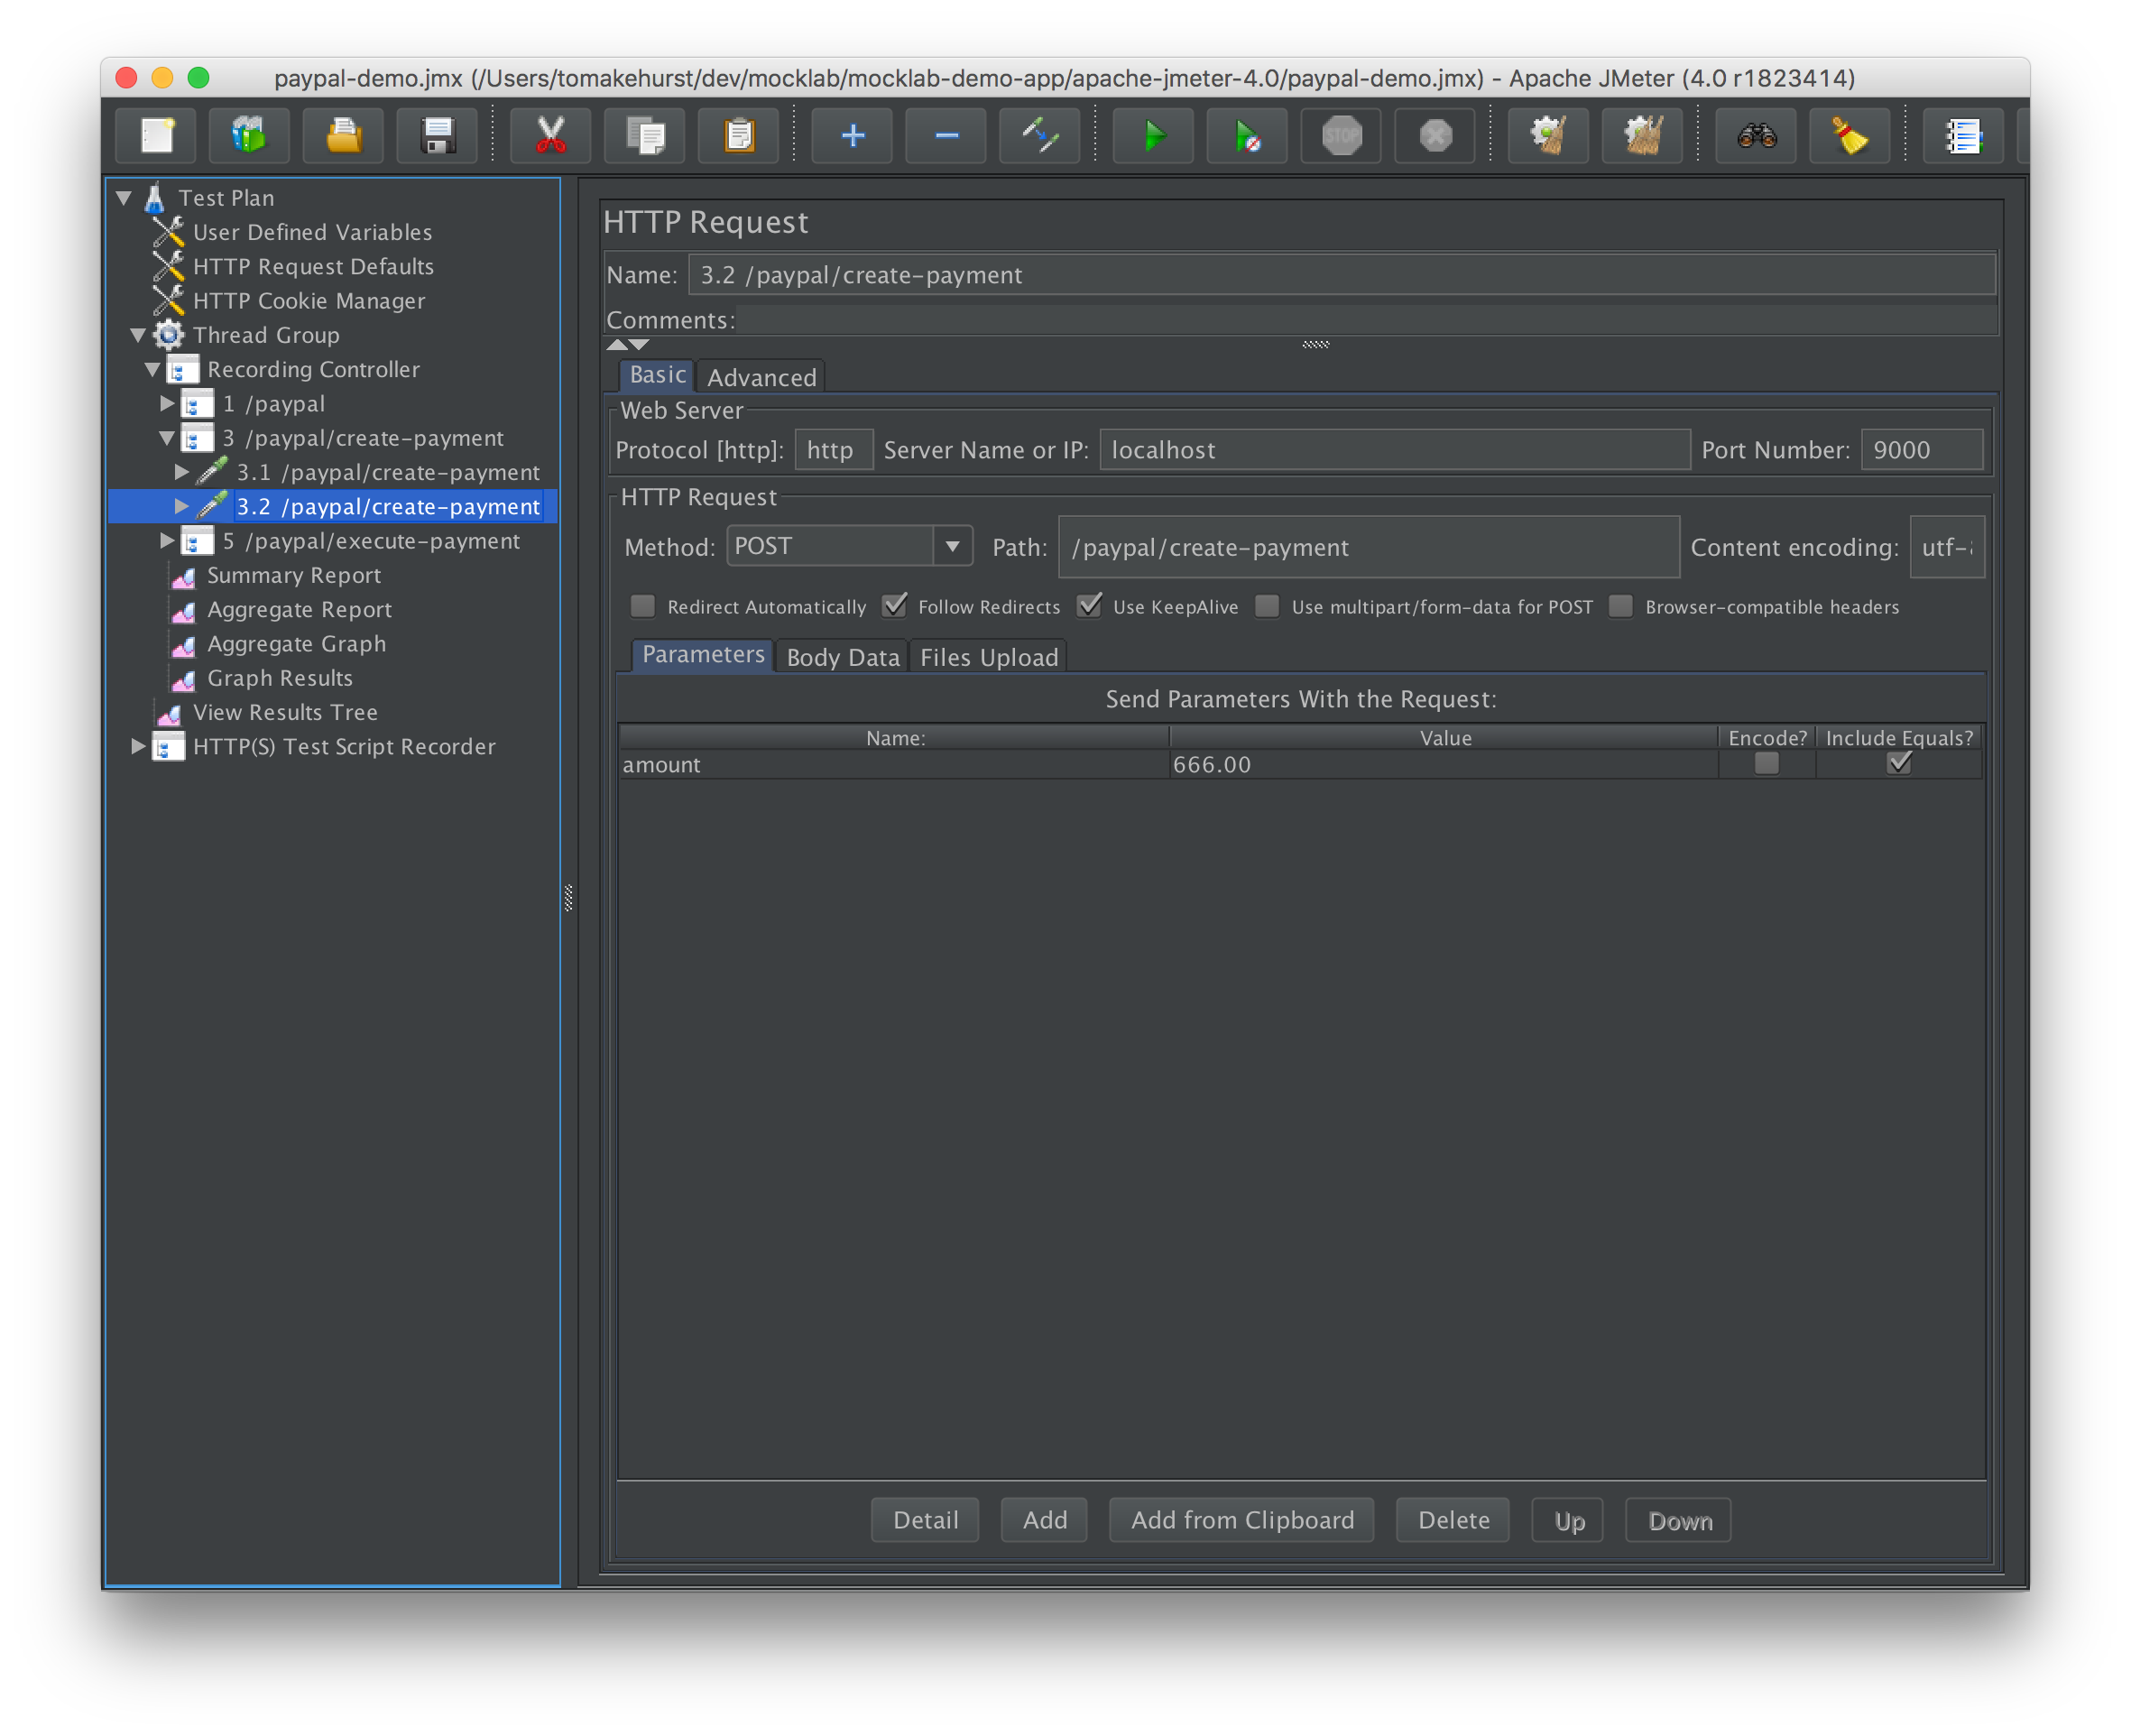
Then just hit play to start testing!
If you've made it this far there's a good chance you're building a system that relies on 3rd party APIs. WireMock Cloud can help you test your system when those APIs don't exist yet, have flakey test environments or are expensive to call.
It's quick and simple to get started with and it's powered by open source WireMock so it has the flexibility to grow with your project's testing demands.
Learn more
Get started for free

/
Latest posts

.png)
Have More Questions?

.svg)


.svg)